Wheel throwing is a traditional pottery technique that involves shaping clay on a potter’s wheel to create various ceramic vessels. This skill has been practiced for centuries and continues to be celebrated in contemporary art and craft communities. The mastery of wheel throwing requires a combination of technical knowledge, manual dexterity, and artistic sensibility, making it an engaging and fulfilling craft form.
For instance, imagine a novice potter attempting their first wheel throwing project. They carefully center the clay on the spinning wheel head, feeling the resistance as they apply pressure with their hands to shape the clay into a symmetrical cone. With each gentle touch and precise movement, the object begins to take form under their fingertips. As they continue to work on refining the vessel’s walls and opening up its interior space, they experience firsthand the delicate balance between control and letting go – a fundamental aspect of wheel throwing.
In this article, we will explore the world of wheel throwing by delving into essential skills, techniques, and tools required to embark on this creative journey. Furthermore, we will examine how artists throughout history have harnessed these skills to express their unique visions through pottery. Whether you are interested in learning wheel throwing as a hobby or pursuing it professionally as a skilled artisan, this guide aims to provide you with a comprehensive understanding of wheel throwing and equip you with the necessary knowledge to get started on your own pottery adventures.
We will begin by discussing the basic equipment and materials needed for wheel throwing, including the potter’s wheel itself, clay types, and essential tools such as ribs, trimming tools, and sponges. Understanding the properties of different clays and how they behave during the throwing process is crucial in achieving desired results.
Next, we will delve into the step-by-step process of wheel throwing, breaking it down into key stages such as centering, opening, pulling up walls, shaping, and finishing. We will explain each stage in detail, providing tips and techniques to help you navigate through them smoothly.
Additionally, we will explore various decorative techniques that can be applied to wheel-thrown pottery. From creating texture using carving or stamping tools to incorporating colored slips or glazes for vibrant finishes – there are endless possibilities to enhance the aesthetic appeal of your creations.
Throughout this guide, we will also highlight inspirational examples from renowned potters who have made significant contributions to the craft of wheel throwing. By studying their work and learning about their techniques and artistic philosophies, you can gain valuable insights that may inform your own creative journey.
Whether you aspire to create functional dinnerware or sculptural art pieces, mastering wheel throwing opens up a world of possibilities in clay manipulation. With practice and dedication, you can develop your skills over time and discover your unique style within this ancient craft form.
So grab some clay, sit at the potter’s wheel with an open mind and willing hands – let’s embark on this exciting adventure into the captivating realm of wheel throwing!
History of Wheel Throwing
History of Wheel Throwing
Wheel throwing is a pottery technique that has been practiced for thousands of years, with its origins dating back to ancient civilizations. One notable example is the Majiayao culture in China, which thrived between 3300 and 2000 BCE. Archaeological findings have revealed beautifully crafted ceramic vessels created using the wheel throwing method during this period. By examining the history of wheel throwing, we can gain insight into its significance as an art form and understand how it has evolved over time.
To grasp the development of wheel throwing, it is crucial to explore its cultural context. The practice emerged independently across various regions, including Mesopotamia, Egypt, and East Asia. In each location, potters utilized different techniques and materials based on their available resources and artistic traditions. Despite these differences, one common thread unites them all: the use of the potter’s wheel as a transformative tool in shaping clay.
When considering the historical importance of wheel throwing, several key aspects come to light:
- Artistic Expression: Wheel thrown pottery enabled artists to create intricate designs and patterns that showcased their creativity.
- Functional Utility: Utilitarian objects like bowls or jugs were produced efficiently through wheel throwing while maintaining durability.
- Cultural Significance: Ceramics made via this technique served as valuable artifacts representing specific cultures’ customs and practices.
- Technological Advancement: Over time, advancements in ceramics production led to improvements in kilns and glazing techniques.
A closer examination reveals the interplay between technological progress and artistic expression throughout history. For instance, comparing early Egyptian pottery with later Greek ceramics demonstrates evolving styles influenced by societal changes. Understanding these nuances helps us appreciate both the aesthetics and practicality inherent in wheel thrown pottery.
By delving into the rich tapestry of its past, we can better comprehend how essential tools play a role in enabling artisans to master this craft today. In the subsequent section, we will explore the tools necessary for successful wheel throwing and how they contribute to the creation of beautiful ceramics.
(Note: The last sentence transitions into the next section without explicitly stating “step”.)
Essential Tools for Wheel Throwing
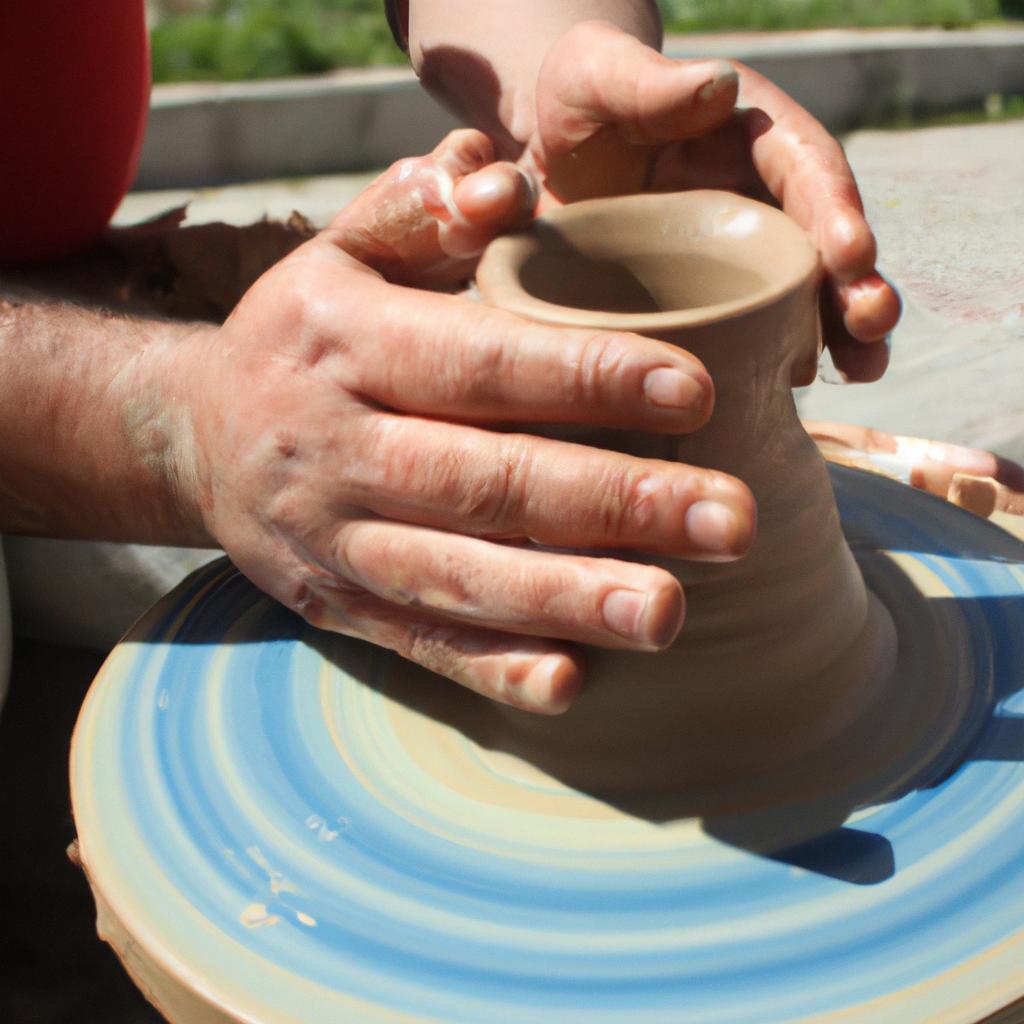
Imagine a potter sitting at a pottery wheel, their hands gently shaping the wet clay into a beautiful piece of art. This is the essence of wheel throwing, a technique that has been practiced for centuries. In this section, we will explore the techniques and process involved in wheel throwing, providing you with valuable insights to enhance your skills as a potter.
To begin with, let’s delve into the fundamental steps of wheel throwing:
-
Centering the Clay: The first step in wheel throwing is centering the clay on the pottery wheel head. By applying gentle pressure and using precise hand movements, the potter ensures that the clay is balanced and stabilized before proceeding further.
-
Opening Up: Once the clay is centered, it’s time to create an opening by pushing your thumbs or fingers into the center of the clay mound. This initial opening defines the basic shape and size of the vessel being created.
-
Pulling Up: As you gradually increase upward pressure on the walls of the clay cylinder, you begin to pull up and shape it according to your desired design. Skillful coordination between your hands and foot pedal control allows for smooth movement and precision during this stage.
-
Trimming and Finishing: After pulling up your vessel to its intended height, trimming becomes crucial for refining its form and removing excess weight from both inside and outside surfaces. This final touch brings out aesthetic details while ensuring structural integrity.
Now imagine yourself going through these steps – skillfully maneuvering through each stage – transforming raw clay into functional or decorative objects that reflect your artistic vision.
Engaging Bullet Point List (Markdown Format):
- Experience moments of tranquility as you manipulate pliable clay.
- Cultivate patience as you carefully transform amorphous blobs into elegant shapes.
- Discover satisfaction when witnessing tangible progress throughout each step.
- Embrace creativity as you experiment with various forms and designs.
Engaging Table (Markdown Format):
| Benefits of Wheel Throwing | Techniques and Process |
|---|---|
| 1. Therapeutic | 1. Centering the Clay |
| 2. Expressive | 2. Opening Up |
| 3. Skill development | 3. Pulling Up |
| 4. Sense of accomplishment | 4. Trimming and Finishing |
As you grow more familiar with the techniques and process involved in wheel throwing, your skills will continue to develop, allowing for a greater level of artistic expression in your pottery creations.
Now that we have explored the techniques and process of wheel throwing, let’s move on to the next step: Preparing Clay for Wheel Throwing, where attention to detail is crucial in achieving desired results.
Preparing Clay for Wheel Throwing
Transitioning from the previous section on essential tools, let’s now dive into the process of preparing clay for wheel throwing. Imagine you are a beginner potter looking to create your first ceramic masterpiece. Before you can begin shaping and molding the clay on the wheel, it is crucial to understand how to properly prepare and condition the raw material.
To illustrate this process, consider a hypothetical scenario where Mary, an aspiring potter, wants to make a set of mugs for her friends. She starts by selecting a bag of moist clay from her supply shelf. The first step in preparing the clay involves wedging or kneading it thoroughly. By applying pressure and folding motions with her hands, Mary ensures that any air pockets within the clay are eliminated and that its consistency becomes even throughout.
Once wedged, there are several key steps involved in preparing the clay for wheel throwing:
- Weighing: Using a pottery scale or balance beam scale, measure out specific amounts of clay according to your project’s requirements.
- Hydrating: If necessary, add small amounts of water to increase moisture content and improve workability.
- Centering: Place the ball of clay on top of the wheel head and use gentle pressure while spinning at low speed to achieve perfect centering.
- Opening: Begin shaping your piece by pressing down in the center using your thumbs while gradually increasing speed until reaching desired width and depth.
Now imagine yourself as Mary successfully following these steps, ready to embark on your own pottery journey with confidence! As we transition into exploring basic techniques in wheel throwing, keep in mind that proper preparation serves as a solid foundation for creating beautiful ceramics.
Basic Techniques in Wheel Throwing
After understanding the steps involved in preparing clay for wheel throwing, let us now delve into the basic techniques that are utilized during this process. By examining these fundamental skills, we can develop a solid foundation upon which to build our pottery creations.
One technique commonly employed is centering the clay on the potter’s wheel. Imagine you have just sat down at your wheel and placed a lump of clay on its surface. As you begin to spin the wheel, using gentle pressure from your hands and fingers, you gradually coax the clay into finding its balance at the center. This crucial step ensures stability as well as symmetrical shaping throughout the throwing process.
Once centered, it is time to open up or establish an initial form within the clay. With skilled precision, use your thumbs or fingertips to create an opening by pushing downwards and outwards from the center of the mound. The depth and width of this initial opening will depend on factors such as the desired shape of your vessel or art piece.
When establishing height in wheel thrown pottery, pulling up walls becomes essential. Using one hand inside and another outside of your forming vessel, apply even pressure while gradually raising and thinning the walls upwards. This action requires practice and control to maintain consistent thickness throughout each revolution.
To provide further guidance in learning these foundational techniques, consider some key points:
- Relaxation: Maintaining a calm mindset aids in achieving fluid movements.
- Patience: Take time with each step to ensure proper execution.
- Consistency: Practice regularly to refine muscle memory and enhance skill development.
- Adaptability: Experiment with different types of clays, tools, and shapes to expand creative possibilities.
In addition to these insights, reference this table showcasing common challenges faced when first starting wheel throwing:
| Challenge | Solution |
|---|---|
| Difficulty Centering | Slow down rotation speed; moisten hands slightly |
| Uneven Walls | Apply pressure evenly and consistently while pulling up |
| Collapsing Forms | Gradually build height, reinforcing with controlled movements |
| Cracking or Drying Too Fast | Cover pottery with plastic to slow down moisture evaporation |
By familiarizing yourself with these techniques and keeping in mind the aforementioned pointers, you can enhance your wheel throwing skills and embark on a creative journey filled with endless possibilities. The next section will explore the captivating world of decorating and glazing wheel thrown pottery, where we’ll discover how to add unique details and finishes to our creations.
Decorating and Glazing Wheel Thrown Pottery
Section H2: Decorating and Glazing Wheel Thrown Pottery
Transitioning from the previous section, where we explored the basic techniques in wheel throwing, let us now delve into the art of decorating and glazing wheel-thrown pottery. To illustrate the significance of this stage, imagine a potter named Sarah who has just successfully thrown a beautiful vase on her potter’s wheel. Now comes the exciting part – transforming that plain clay vessel into a work of art through various decoration and glazing methods.
Decorating and glazing offer endless possibilities for personal expression and creativity in pottery making. By applying surface treatments to their pieces, potters can enhance the visual appeal, add texture, or tell stories through intricate designs. Here are some key techniques commonly used:
-
Carving: Potters can carve patterns or motifs directly onto leather-hard clay using specialized tools such as loop tools or carving knives. This technique creates depth and adds dimension to the piece.
-
Slip Trailing: Slip trailing involves applying liquid clay (slip) onto the surface of a pot with a fine-tipped applicator bottle. The slip can be different colors and consistency, allowing artists to create detailed lines, dots, or even elaborate illustrations.
-
Sgraffito: In sgraffito technique, layers of contrasting colored slips are applied to the ceramic piece. Once dried, an artist scratches away parts of the top layer with sharp tools to reveal the lower layer beneath it, resulting in intricate etched designs.
-
Mishima: A delicate technique originating from Korea and Japan, mishima involves incising fine lines into leather-hard pottery then filling them with contrasting colored slip before scraping off any excess material on the surface.
To further inspire your creative journey in pottery making, here is a glimpse at how these decorative techniques come together:
| Technique | Description | Emotional Response |
|---|---|---|
| Carving | Creates a tactile experience for the viewer | Excitement |
| Slip Trailing | Adds intricate details and delicate patterns | Intrigue |
| Sgraffito | Provides an element of surprise with hidden designs | Discovery |
| Mishima | Evokes a sense of elegance and precision | Awe |
As potters explore these techniques, they can create unique pieces that capture attention and evoke emotional responses from their audience. By skillfully combining decoration methods, artists can transform a plain wheel-thrown vessel into a captivating work of art.
Transitioning effortlessly to our subsequent section on troubleshooting common wheel throwing issues, let us now equip ourselves with the knowledge needed to overcome any challenges that may arise during the pottery-making process.
Troubleshooting Common Wheel Throwing Issues
Section H2: Troubleshooting Common Wheel Throwing Issues
Transitioning from the previous section on decorating and glazing wheel thrown pottery, we now turn our attention to troubleshooting common issues that may arise during the wheel throwing process. By understanding these challenges and their potential solutions, potters can enhance their skills and craftsmanship.
Imagine a scenario where a potter is working on creating a tall vase using the wheel throwing technique. As they shape the clay on the wheel, they encounter an issue with maintaining consistent thickness throughout the walls of the vase. This problem often arises due to uneven pressure applied by the potter’s hands or improper centering of the clay on the wheel. To rectify this situation, several techniques can be employed:
- Slow down your wheel speed: A fast-spinning wheel can make it difficult to control evenness in wall thickness. Reducing the speed will allow for more precision.
- Use rib tools: Rib tools are excellent for smoothing out any imperfections and ensuring uniformity in wall thickness.
- Practice proper hand positioning: Keeping your hands at an equal distance from each other while applying pressure will help maintain consistency.
- Re-center as needed: If you notice inconsistencies developing as you work, take a moment to re-center your piece before proceeding further.
In addition to addressing uneven wall thickness, other common issues in wheel throwing include cracking during drying or firing, warping after trimming, and difficulties in attaching handles securely. These challenges can be overcome with some practical tips:
| Issue | Possible Solutions |
|---|---|
| Cracking | – Slowly dry pieces by covering them loosely with plastic wrap.- Bisque fire slowly.- Apply thicker layers of slip when joining sections. |
| Warping | – Allow pots to dry evenly without drafts.- Support rims and bases during drying.- Trim bottoms symmetrically. |
| Handle Attachment | – Score and slip areas where the handle will be attached.- Apply gentle pressure to ensure a secure bond.- Smooth any excess clay. |
In conclusion, troubleshooting common wheel throwing issues is an essential part of developing pottery skills. By recognizing these challenges and implementing appropriate techniques, potters can enhance their craftsmanship and overcome obstacles that may arise during the creative process. With practice and persistence, one can achieve mastery in wheel throwing and create beautiful pottery pieces.
Comments are closed.