Woodworking is a time-honored craft that involves shaping and transforming wood into beautiful, functional objects. One crucial aspect of this craft is wood finishing, which not only enhances the aesthetic appeal of the final product but also protects it from various environmental factors. For instance, imagine a skilled woodworker meticulously crafting a custom-made dining table for a client. While the design and construction are essential, it is the skillful application of wood finishes that will truly bring out the natural beauty of the wood grain and ensure its longevity.
Mastering the art of wood finishing requires both theoretical knowledge and practical skills. Woodworkers must understand different types of finishes available, such as varnishes, oils, stains, or lacquers, and their specific properties to determine the most suitable one for each project. Moreover, they need to learn proper techniques for surface preparation and application to achieve flawless results. By enhancing their skills in wood finishing, craftsmen can elevate their woodworking projects to new levels of excellence while adding value to their work through exceptional craftsmanship.
In this article, we will delve deeper into the world of wood finishing. We will explore various aspects related to this important stage in woodworking, including different types of finishes available and their characteristics. Furthermore, we will discuss essential tools and equipment needed for wood finishing, as well as step-by-step techniques for achieving professional results. Additionally, we will provide tips and tricks for troubleshooting common issues that may arise during the wood finishing process.
When it comes to choosing a wood finish, there are several factors to consider. One of the primary considerations is the desired look and feel of the finished piece. Some finishes, such as varnishes or lacquers, create a glossy and protective surface that highlights the natural beauty of the wood grain. On the other hand, oils or waxes can enhance the natural color and texture of the wood while providing a more matte or satin-like appearance.
Each type of finish also has its own unique properties in terms of durability and protection. Varnishes, for example, are known for their excellent resistance to moisture, heat, and chemicals. They form a hard protective layer on the surface of the wood that can withstand heavy use. Oils, on the other hand, penetrate into the wood fibers to nourish and protect them from within while enhancing their natural beauty.
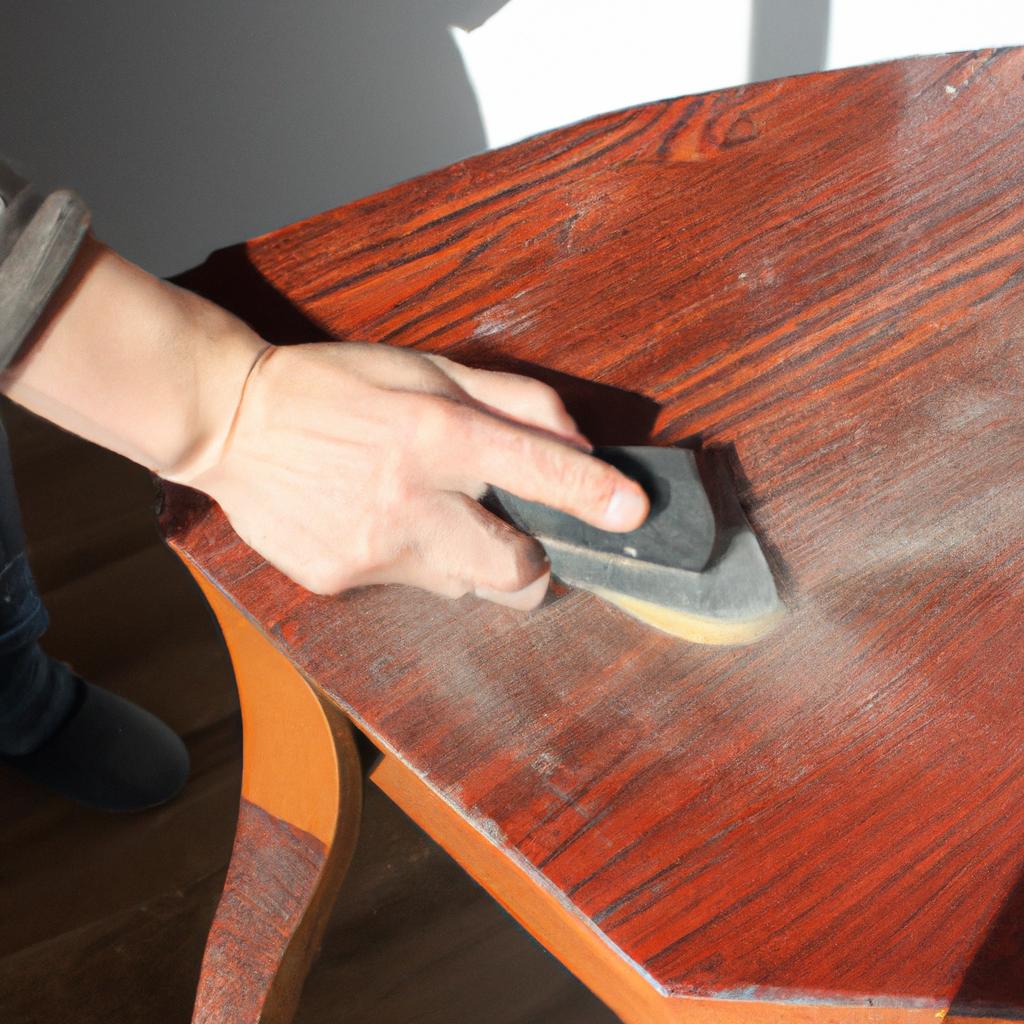
Before applying any finish, proper surface preparation is crucial. This involves sanding the wood to achieve a smooth and even surface free from imperfections. It is important to start with coarse-grit sandpaper and gradually move to finer grits for optimal results. After sanding, it is essential to remove all dust particles using a tack cloth or vacuum cleaner before proceeding with application.
When it comes to applying finishes, there are various techniques available depending on the type of finish chosen. For instance, brushing is commonly used for varnishes or paints, while wiping or rubbing methods work well with oils or stains. It is important to follow manufacturer instructions regarding drying times between coats and recommended number of coats for optimal coverage and protection.
In addition to knowing how to apply finishes correctly, understanding how to troubleshoot common issues can help achieve desired results. Problems such as brush strokes, uneven coloration, or blotching can occur during the finishing process. Knowing how to address these issues through techniques such as sanding between coats, using wood conditioners, or adjusting application methods can make a significant difference in the final outcome.
In conclusion, wood finishing is an essential aspect of woodworking that requires both knowledge and skill. By understanding different types of finishes and their properties, as well as mastering proper techniques for surface preparation and application, woodworkers can elevate their craft to new levels. Whether it’s a dining table, a handcrafted cabinet, or a decorative piece, the art of wood finishing plays a crucial role in bringing out the natural beauty of wood while providing protection and longevity.
Types of Wood Finishes
Wood finishing is a crucial step in woodworking that not only enhances the appearance of a wooden piece but also protects it from wear and tear. There are various types of wood finishes available, each offering unique characteristics and benefits. To illustrate this, let us consider an example: imagine you have crafted a beautiful oak dining table, and now you want to apply a finish that will bring out the natural beauty of the wood while providing durability against spills and stains.
When choosing a wood finish, there are several factors to consider. First and foremost is the desired aesthetic effect. Some finishes offer a glossy sheen that reflects light, giving the wood a polished look. Others provide a matte or satin finish for a more subtle appearance. The choice depends on personal preference and the intended style of the piece.
Additionally, different finishes offer varying levels of protection to the wood surface. Some finishes form a protective barrier against moisture, preventing warping or swelling over time. Others provide resistance to scratches and abrasions, making them suitable for high-traffic areas such as tabletops or floors.
To further understand the range of options available when it comes to wood finishes, consider the following bullet points:
- Oil-based finishes: These penetrate deep into the wood fibers, enhancing its natural grain patterns and color.
- Water-based finishes: These dry quickly and emit fewer fumes compared to oil-based counterparts.
- Shellac: Derived from insect secretions, shellac offers excellent adhesion properties and imparts warmth to lighter woods.
- Varnish: Known for its exceptional durability and ability to withstand harsh weather conditions.
The table below summarizes some key features of these common wood finishes:
| Finish | Appearance | Durability | Drying Time |
|---|---|---|---|
| Oil-based | Enhances grain | Good | Slow |
| Water-based | Subtle | Moderate | Fast |
| Shellac | Warm | Fair | Moderate |
| Varnish | Glossy | Excellent | Slow to fast |
Understanding the different types of wood finishes is essential for achieving the desired outcome in woodworking projects. In the subsequent section on surface preparation, we will explore how to properly prepare the wood before applying any finish, ensuring optimal results and long-lasting beauty.
(Note: Transition into subsequent section)
Surface Preparation plays a crucial role in achieving desirable wood finishing outcomes.
Surface Preparation
Enhancing the durability and aesthetics of wood requires thorough surface preparation. By preparing the wood properly, you lay the foundation for a flawless finish that will enhance its natural beauty. Let’s explore some essential steps involved in surface preparation.
Imagine you have just acquired a beautiful oak table with intricate carvings. To restore its former glory, you begin by carefully inspecting the surface for any imperfections such as scratches or dents. Once identified, these blemishes can be repaired using appropriate techniques like sanding or filling.
In addition to repairing imperfections, it is important to ensure that the wood is smooth and free from any contaminants before applying finishes. This involves thoroughly cleaning the surface to remove dust, dirt, grease, or wax residues that may interfere with adhesion. A clean surface ensures better penetration of stains and helps achieve a uniform finish.
To aid in understanding the key aspects of surface preparation, let us consider four fundamental steps:
- Sanding: Using various grits of sandpaper gradually smoothes out rough patches and removes old finishes.
- Filling: Applying suitable fillers fills gaps, cracks, or holes on the wood’s surface.
- Sealing: Primarily used for porous woods, sealing prevents uneven absorption of finishes and enhances overall appearance.
- Conditioning: Preparing certain types of wood through conditioning improves stain absorption and promotes an even color distribution.
To illustrate the importance of proper surface preparation further, let’s take a look at this comparison table showcasing two different approaches:
| Surface Preparation Method | Result |
|---|---|
| Insufficient sanding | Uneven finish |
| Neglected cleaning | Poor adhesion |
| Lack of filling | Visible defects |
| No sealing | Inconsistent coloration |
By following thorough surface preparation methods like those mentioned above, craftsmen are able to create stunning pieces that stand the test of time. With a well-prepared surface, you are now ready to move on to applying stains and dyes to further enhance the wood’s appearance.
Transitioning into the next section about “Applying Stains and Dyes,” it is important to understand how different finishes can interact with the prepared surface to achieve desired results.
Applying Stains and Dyes
Surface preparation plays a crucial role in achieving a flawless wood finish. By diligently preparing the wood surface, you create an ideal canvas for applying stains and dyes that will enhance the natural beauty of the wood. Let’s explore the process of applying stains and dyes to elevate your woodworking projects.
Imagine you have crafted a beautiful oak dining table with intricate details on its surface. To accentuate these details and bring out the richness of the oak, you decide to use a dark stain. Applying stains involves careful consideration of several factors such as type of wood, desired color intensity, and personal preference. By choosing the right stain, you can completely transform the appearance of your project while maintaining its inherent characteristics.
When it comes to applying stains and dyes effectively, there are some essential techniques to keep in mind:
- Ensure uniformity: Before application, make sure to thoroughly sand the wood surface to remove any imperfections or roughness that may hinder proper absorption.
- Test on scrap pieces: It is always advisable to test different stains or dye combinations on scrap pieces from the same project before committing to one particular approach. This allows you to evaluate how each option interacts with your specific wood species.
- Apply evenly: Whether using brushes or cloths for application, ensure consistent coverage across all surfaces. Uneven staining can result in unsightly blotches or streaks.
- Monitor drying time: The length of time required for a stain or dye to dry varies depending on factors like humidity levels and temperature. Allow sufficient drying time between coats for optimal results.
To further illustrate these concepts, consider this example showcasing different types of woods along with their corresponding recommended stains/dyes:
| Wood Type | Recommended Stain/Dye |
|---|---|
| Maple | Light Walnut |
| Cherry | Deep Red Mahogany |
| Birch | Honey Amber |
| Mahogany | Golden Brown |
By selecting the appropriate stain or dye for each wood type, you can achieve stunning results that enhance the natural characteristics of your woodworking projects.
As we delve into the next section on sealing and protecting wood, it is important to remember that applying stains and dyes is an art in itself. It requires careful consideration of various factors such as wood species, desired outcome, and application techniques. By mastering this skill, you will be able to elevate your woodworking craftsmanship to new heights.
Sealing and Protecting Wood
Building upon the knowledge of applying stains and dyes, we now turn our attention to sealing and protecting wood. The application of a protective finish not only enhances the natural beauty of wood but also safeguards it against wear, moisture, and other environmental factors. To illustrate the importance of this step, consider the following example:
Example: Imagine you have meticulously crafted an exquisite dining table from rich mahogany. Without proper protection, this masterpiece could be susceptible to scratches and water damage over time. By understanding the techniques for sealing and protecting wood, you can ensure that your hard work withstands the test of time while maintaining its inherent allure.
Paragraph 1:
To effectively seal and protect wood, several methods are available—each with its own advantages and considerations. Here are some commonly used options:
- Polyurethane: A popular choice due to its durability, polyurethane forms a strong barrier on the surface of the wood.
- Varnish: Offering a glossy or satin sheen, varnish provides excellent protection against sunlight exposure.
- Shellac: Derived from natural resins secreted by insects, shellac creates a warm amber hue while offering moderate protection.
- Lacquer: Known for its quick-drying properties, lacquer imparts a smooth finish ideal for intricate woodworking details.
Bullet Point List (Emotional Response):
When choosing a method to seal and protect your wooden creations, keep in mind these essential aspects:
- Longevity: Select finishes that offer long-lasting protection without compromising aesthetic appeal.
- Ease of Application: Consider finishes that are user-friendly and provide consistent results.
- Compatibility: Ensure compatibility between your chosen finish and any previous treatments applied to the wood.
- Environmental Impact: Opt for eco-friendly finishes that align with sustainable practices.
Paragraph 2:
To further understand how different finishes perform under various conditions, refer to the following comparison table:
| Finish | Durability | Appearance | Drying Time |
|---|---|---|---|
| Polyurethane | High | Satin/Glossy | Moderate |
| Varnish | Medium | Glossy/Satin | Slow |
| Shellac | Low | Amber/Warm | Fast |
| Lacquer | High | Smooth | Very fast |
Table (Emotional Response):
This table provides a quick overview of the various finishes commonly used in wood sealing and protection. By considering factors such as durability, appearance, and drying time, you can make an informed decision that aligns with your desired outcome.
Paragraph 3:
By mastering the art of sealing and protecting wood, you not only enhance its visual appeal but also extend its lifespan. The choice of finish should be guided by both practical considerations and personal preferences. In the subsequent section on “Techniques for Achieving Smooth Finishes,” we will delve into the next crucial step in achieving flawless woodworking results without interruption.
As we continue our exploration of wood finishing techniques, let us now explore the methods employed to achieve smooth finishes.
Techniques for Achieving Smooth Finishes
Having learned about the importance of sealing and protecting wood in the previous section, let us now delve into techniques for achieving smooth finishes. To illustrate these techniques, consider a hypothetical scenario where a craftsman is working on a wooden coffee table. The craftsman wants to achieve a flawless finish that highlights the natural beauty of the wood while providing durability.
To accomplish this goal, there are several key considerations and steps to follow:
-
Sanding: Proper sanding is crucial in achieving a smooth surface before applying any finishing product. This involves using progressively finer grits of sandpaper to eliminate imperfections such as scratches or uneven surfaces. By starting with coarse-grit sandpaper and gradually moving towards finer grits, the craftsman can create an even texture that enhances the final appearance.
-
Staining: In some cases, staining may be desired to add color or enhance the grain pattern of the wood. Before applying stain, it is essential to prepare the surface by removing any dust or residue from sanding. Applying stain evenly requires attention to detail and careful application techniques such as wiping off excess stain after allowing it to penetrate the wood.
-
Finishing Products: Once the desired color has been achieved through staining (if applicable), it is time to apply a protective finish. There are various options available, including polyurethane varnishes, lacquers, shellacs, or oils like tung oil or linseed oil. Each type of finish has its unique characteristics and application methods which should be followed diligently for optimal results.
By employing these techniques and paying close attention to details throughout each step, our hypothetical craftsman successfully achieves a flawlessly smooth finish on their wooden coffee table project. Such meticulousness in woodworking ensures not only enhanced aesthetics but also increased longevity and protection against everyday wear and tear.
Let’s now transition into exploring methods of enhancing the natural beauty of wood without compromising its integrity. This next section will provide insights into techniques that bring out the inherent characteristics and unique features of different wood species, further elevating the overall appeal of woodworking projects.
Enhancing the Natural Beauty of Wood
Section H2: Enhancing the Natural Beauty of Wood
Building upon the techniques for achieving smooth finishes discussed in the previous section, this section delves into how woodworkers can further enhance the natural beauty of wood. By employing various methods and materials, craftsmen are able to bring out the distinct characteristics and aesthetic appeal hidden within each piece of timber.
Case Study:
To illustrate these concepts, let us consider a hypothetical scenario involving a seasoned woodworker named Alex. Alex recently acquired a beautifully grained piece of walnut which he plans to transform into an elegant dining table. Through carefully selected finishing techniques, he aims to highlight and accentuate the inherent richness and depth that lie beneath its surface.
Methods for Enhancing Natural Beauty:
To achieve exceptional results when enhancing the natural beauty of wood, craftsmen often employ several tried-and-true methods:
-
Staining Techniques:
- Applying stains selectively to emphasize certain areas or patterns.
- Experimenting with different stain colors to create unique effects.
- Utilizing dye stains for more vibrant and consistent coloration.
-
Surface Treatments:
- Employing sanding sealer before applying finish coats for smoother surfaces.
- Using grain fillers to level unevenness in open-pored woods like oak or ash.
- Incorporating glazes or toners to add depth and dimensionality.
-
Finishing Materials:
- Opting for oil-based finishes to enhance natural warmth and grain definition.
- Choosing water-based finishes for their lower toxicity levels and ease of use.
- Exploring specialized products such as shellac or French polish for traditional aesthetics.
Table: Comparing Different Finish Characteristics
| Finish Type | Pros | Cons |
|---|---|---|
| Oil-Based | Deepens grain appearance | Longer drying times |
| Water-Based | Quick drying | Less depth in appearance |
| Shellac | Traditional aesthetic | Susceptible to alcohol |
| French Polish | High gloss, rich look | Time-consuming process |
By skillfully applying staining techniques, surface treatments, and carefully selecting appropriate finishing materials, woodworkers like Alex can elevate the natural beauty of wood to new heights. Through their craftsmanship, they unlock the innate splendor concealed within each piece of timber, creating lasting works of art that captivate both the eye and the soul. Embracing these methods allows craftsmen to create furniture and woodworking projects that truly stand out in terms of aesthetics, showcasing the potential hidden within this versatile material.
Comments are closed.